
Power Functions
Power Functions allow you to extend WeTransform by integrating your own custom logic directly into the transformation process.
What are Power Functions?
Think of them as custom plugins that run on your server but are controlled by WeTransform. They enable you to perform tasks that standard functions can't, like querying your database, calling an external AI, or validating complex business rules.
Two integration modes are available: Fetch, where WeTransform calls your API directly — no integration needed on your side — and Callback, where your backend receives a webhook and pushes results back.
Typical Use Cases
- Enrich content using AI (OpenAI, Claude)
- Translate text automatically
- Verify VAT numbers or IDs
- Real-time stock synchronization
Key Benefits
- Highly customizable logic
- No-code Fetch mode for existing APIs
- Asynchronous execution
- Secure HMAC communication
- Works with large datasets
Setting Up a Power Function
Creating and using a Power Function involves a few simple steps in the WeTransform interface.
Step 1: Define the Function
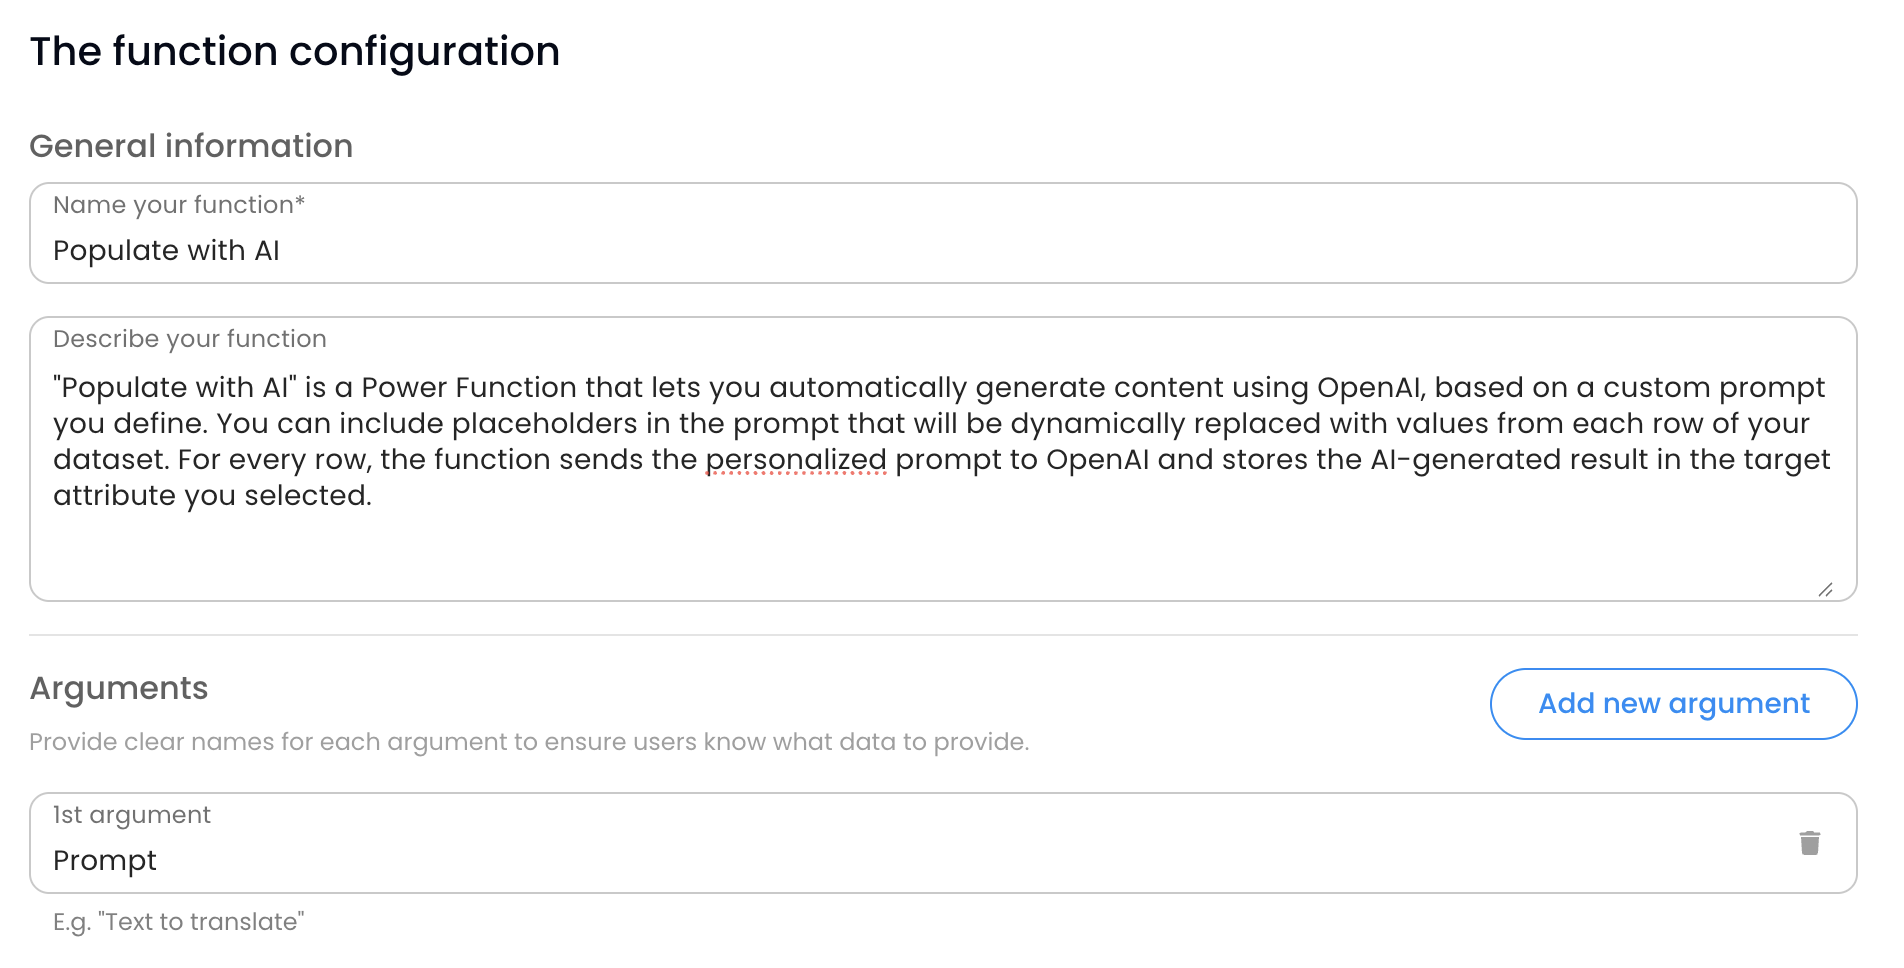
Navigate to the Integrations section and create a new Power Function. Give it a unique internal name, a description, and define the arguments it will receive.
- Name: Used in the rule editor (e.g.,
translate_text). - Arguments: Define what data your server needs.
Step 2: Configure the Request
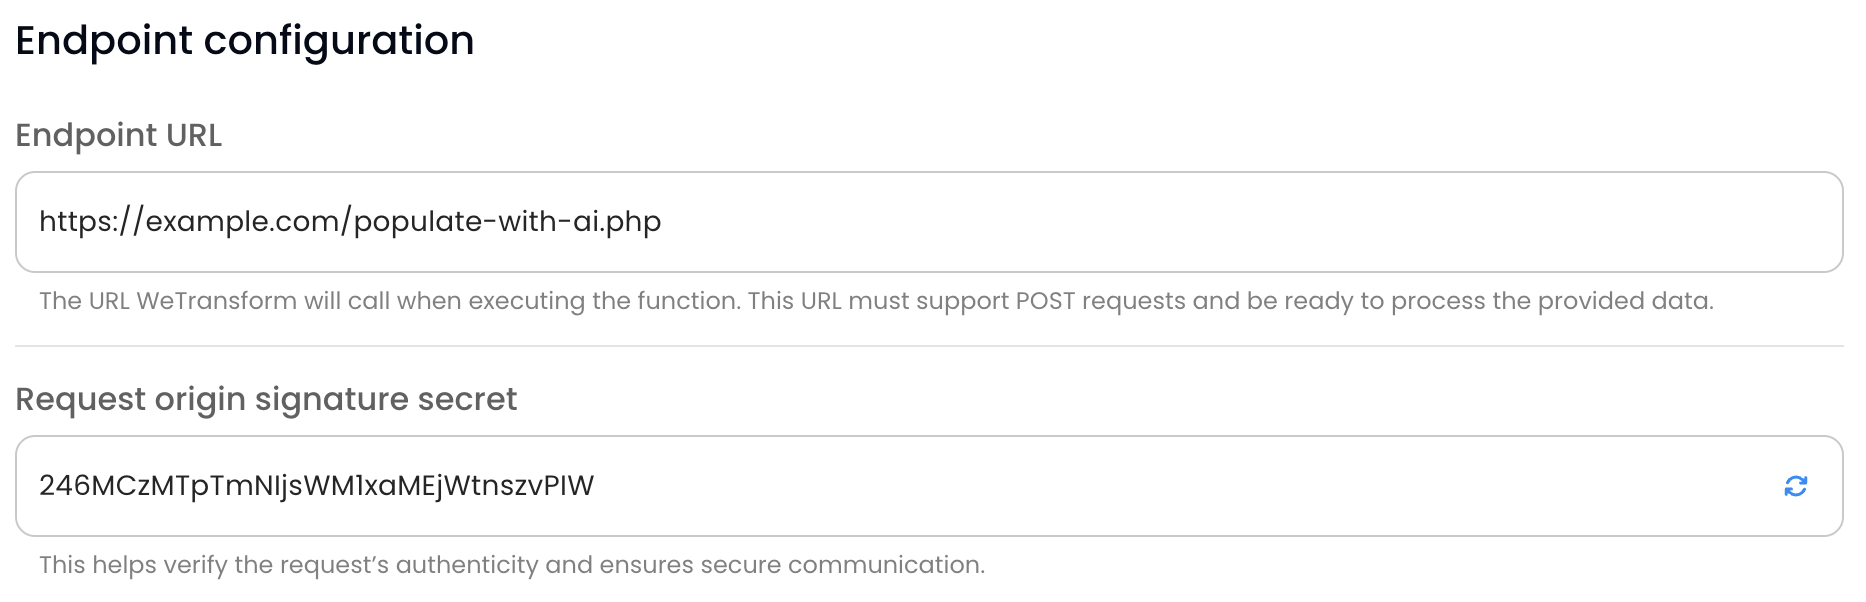
Choose how WeTransform calls your function. In Fetch mode, describe the HTTP request WeTransform executes against your API, once per row. In Callback mode, provide the Callback URL where WeTransform will send the trigger, plus a secret key for HMAC verification.
You can set a call timeout (1-60 seconds per HTTP request), a processing timeout (up to 24 hours for your server to populate every row) and a cache duration.
Step 3: Add to Rules
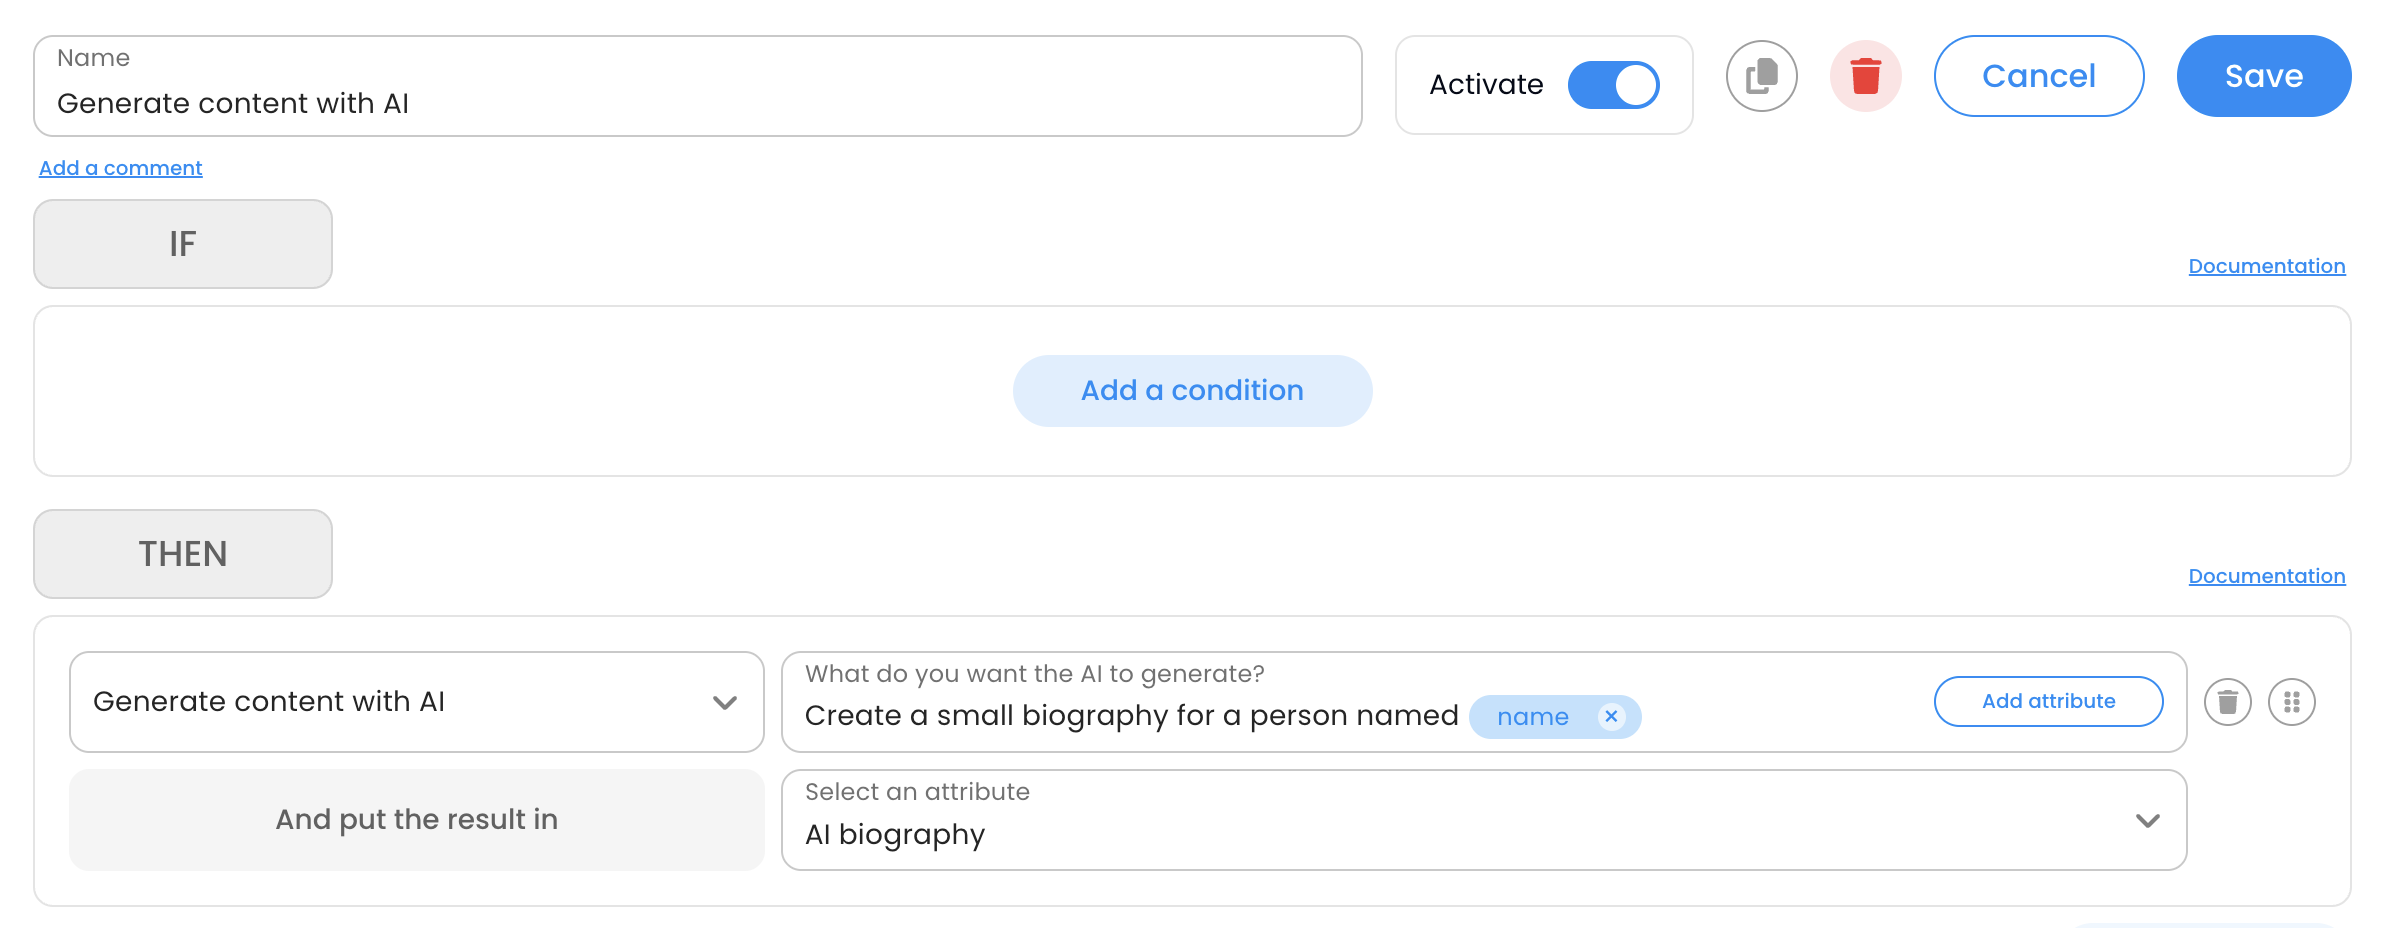
Once created, your function appears in the Rule Editor under the "Power Function" category. Select it and map your attributes to the function arguments.
Step 4: Monitor Execution
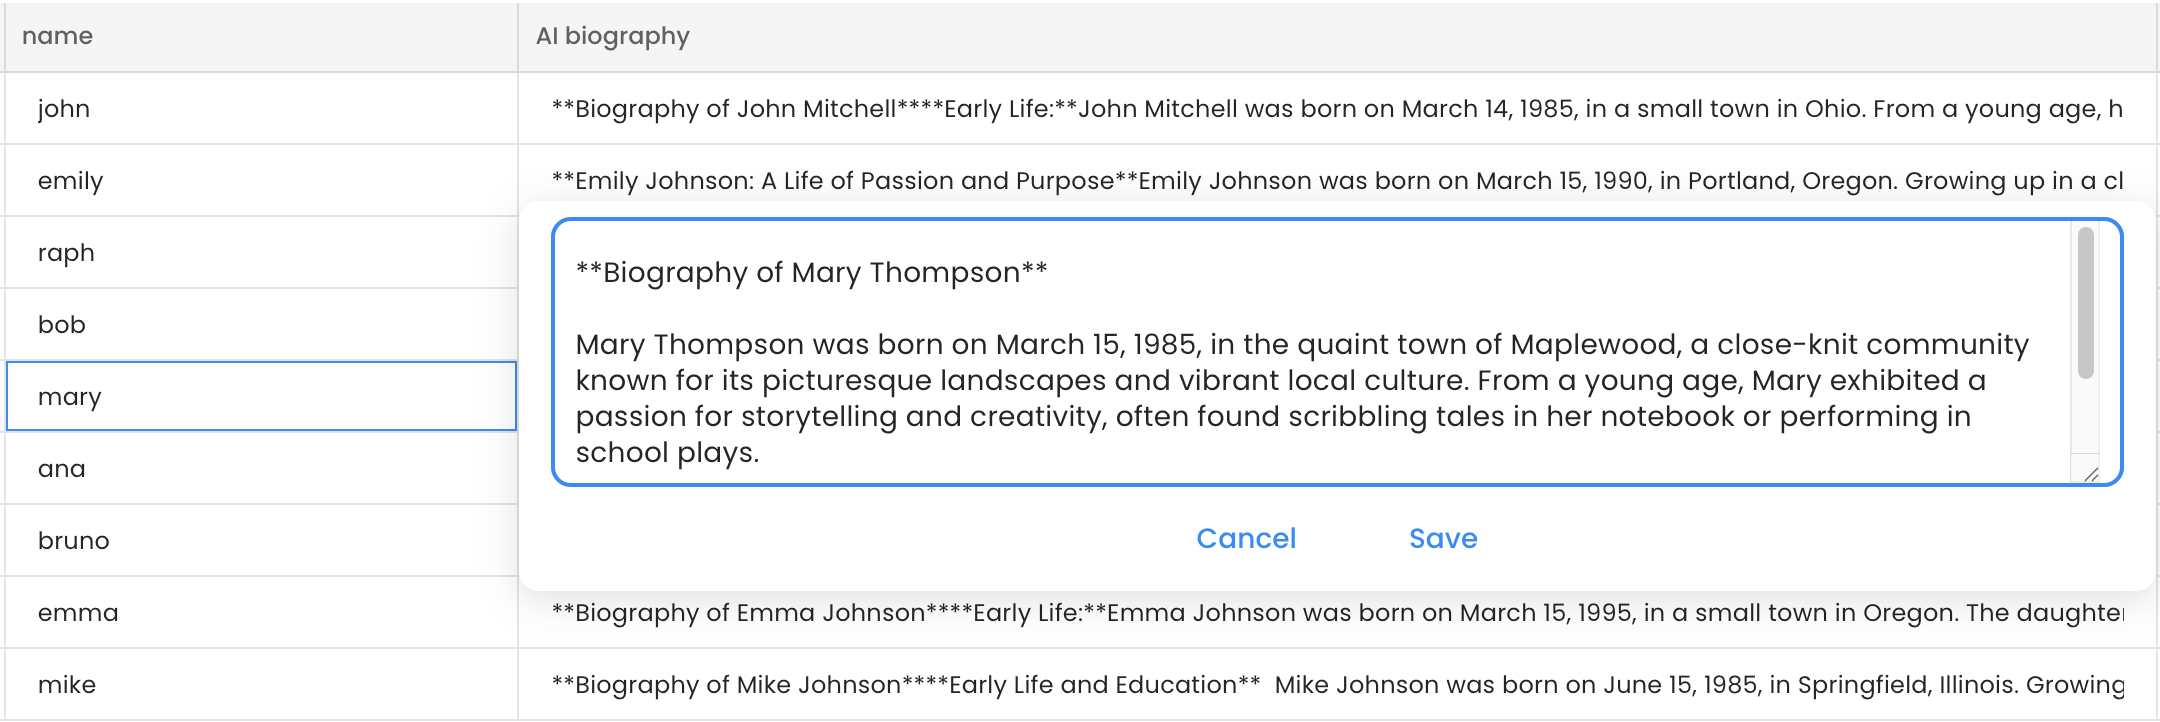
When a transformation runs, the columns affected by Power Functions will show a "pending" status. You can track progress in real-time on the Finalize page.
Execution Modes
A Power Function runs in one of two modes, selected when you configure the request.
Fetch
WeTransform calls your API directly, once per row, with the row's arguments, and reads the outcome straight from the response.
- No integration needed — your existing API is enough
- Simple request template with placeholders
- Best for lookups, enrichment, per-row API calls
Callback
Your backend pushes the results. WeTransform notifies your server that a batch is ready; it fetches the rows and pushes the outcomes back.
- Full control over batching and processing
- HMAC-signed webhooks
- Best for advanced, high-volume integrations
Fetch Mode
In Fetch mode, you describe an HTTP request once, and WeTransform executes it once per row during the transformation, replacing placeholders with each row's values. There is nothing to implement on your side: if your API already exists, you are done.
The Request Template
Configure the method (GET, POST, PUT, PATCH or DELETE), URL, headers and body of the request. The URL, header values and body accept placeholders that are substituted for every row.
GET https://erp.acme.com/api/v1/products/{sku}/price?country={country}
Authorization: Bearer {token}| Placeholder | Replaced by |
|---|---|
{argumentName} |
The row's value for that argument (one placeholder per argument you defined, e.g. {sku}, {country}). |
{token} |
The provider secret: the user's own API key, or your organisation's shared token if you provide one for everyone. |
Values are escaped according to where the placeholder appears: URL-encoded in the URL, JSON-escaped inside JSON bodies, and inserted as-is in headers.
Picking the Outcome
The outcome — what lands in the cell — is read directly from the response. When the response is JSON, you can select
the part you want with a path (e.g. price.amount). The editor's Test button runs the
request once with sample values and lets you click the exact value in the response.
Sample Response
{
  "product": { "sku": "BRK-220", "label": "Brake kit 220 mm" },
  "price": { "amount": 129.95, "currency": "EUR" },
  "updated_at": "2026-07-01T06:12:00Z"
}
With the path price.amount, the cell receives 129.95. Selecting an object stores it whole, as JSON text.
- No path set: the whole response body becomes the outcome.
- Response is not JSON: there is nothing to pick — the whole body is the outcome.
Performance & Caching
- Rows with identical argument values share a single call.
- Outcomes are cached for the configured cache duration and reused on later runs.
- The call timeout (1–60 seconds) applies to each individual request.
{token} placeholder (for example in an Authorization header or an API-key query parameter).
Try It Live: The Meow Demo Endpoint
Want to see Fetch mode work before wiring up your own API? We host a public, no-authentication demo endpoint — meow-as-a-service — that you can point a Fetch power function at right away. It takes any value and hands back a randomized cat meow in one of 26 languages.
GET https://api.wetransform.com/en/documentation/power-functions/meow?text={value}
Define a single argument named value and reference it as {value} in the URL above.
Each row's cell value is sent as text, echoed back, and prefixed to the generated meow.
Sample Response
{
  "input": "Bonjour",
  "meow": "Bonjour miaou!!! MIAOU!!!",
  "language": "French",
  "lang_code": "fr",
  "style": "excited",
  "loudness": 7
}
Set the outcome path to meow to write the meow into the cell.
Append &lang=fr to force a language (en, fr, jp, …);
an unknown code returns 400 with the list of supported languages.
This endpoint needs no token and returns a fresh, random meow on every call — it is meant for trying the feature out, not for production data.
Callback Mode: The Workflow
In Callback mode, Power Functions are asynchronous. This means that when a transformation starts, WeTransform sends a notification (a trigger) to your app, and your app works in the background to process the data.
Trigger
WeTransform notifies your server that work is ready.
Process
Your server fetches data and applies your logic.
Populate
Your server sends the results back to WeTransform.
1. The TRIGGER Call
When a user runs a transformation that includes your Power Function (in Callback mode), WeTransform sends a POST request to your callback URL.
https://your-app.com/callback
{
  "function_name": "My Custom Function",
  "customer": { "customer_id": "...", "name": "John Doe" },
  "transformation": { "transformation_id": "...", "template_handle": "inventory" },
  "call": { "call_id": "9f0c...", "call_number": 3 },
  "endpoints": {
    "fetch": "https://api.wetransform.com/power-functions/9f0c.../3/fetch?page=PAGENUMBER",
    "populate": "https://api.wetransform.com/power-functions/9f0c.../3/populate",
    "abort": "https://api.wetransform.com/power-functions/9f0c.../3/abort"
  },
  "provider_key": null,
  "pages": 12
}
Replace PAGENUMBER in the fetch URL with 1 to pages. provider_key holds your customer's key when the function asks for one, null otherwise.
202 Accepted status code. Do not keep the connection open while processing.
2. The FETCH Endpoint
Use the fetch URL provided in the trigger to retrieve the data to transform. It returns up to 1000 rows per page.
Authenticate the fetch, populate and abort calls with Authorization: Bearer <API token>, using a token of the organisation that owns the function.
https://api.wetransform.com/power-functions/{call_id}/{call_number}/fetch?page=1
Sample Response
{
  "success": true,
  "payload": {
    "is_cancellation_requested": false,
    "rows": [
      {
        "row": 1,
        "arguments": [
          { "name": "EAN", "value": "1234567890123" }
        ]
      }
    ]
  }
}
When is_cancellation_requested is true, stop: the call ended or was superseded by a relaunch. Every endpoint returns this flag.
3. The POPULATE Endpoint
Once your app has processed the data, send the results back using the populate URL.
https://api.wetransform.com/power-functions/{call_id}/{call_number}/populate
{
  "outcomes": [
    {
      "row": 1,
      "outcome": "Transform Result"
    }
  ]
}
Send up to 1000 outcomes per request. The response's impacted_rows counts the rows actually updated. The step completes once every row has an outcome; to finish early, call the abort URL (POST).
Security & Verification
In Callback mode, to ensure the requests come from WeTransform, you must verify the X-Signature header using HMAC SHA256.
In Fetch mode, this does not apply: authenticate WeTransform on your side with the {token} placeholder instead.
function verify_signature($body, $signature, $secret) {
    $expected = hash_hmac('sha256', $body, $secret);
    return hash_equals($expected, $signature);
}const crypto = require('crypto');
function verifySignature(body, signature, secret) {
const expected = crypto.createHmac('sha256', secret).update(body).digest('hex');
return expected.length === signature.length
&& crypto.timingSafeEqual(Buffer.from(expected), Buffer.from(signature));
}